Introduction Hey there, wet shavers! If you’ve been enjoying the classic experience of using a safety razor, you know that keeping it clean is essential for a top-notch shave. But even the most dashing razors can lose their sparkle over time, which is why regular maintenance is key.
In this guide, we’ll take you through a simple 5-step process to clean your safety razor and keep it in pristine condition. Let’s get started!
Why Cleaning Matters
A well-maintained safety razor provides several benefits:
- Smooth glide for a comfortable shave
- Reduced risk of irritation and razor bumps
- Prevention of rust and damage
- Longer lifespan of the razor
- Better hygiene and reduced risk of infection
The Supplies
Before we dive into the cleaning process, let’s gather the supplies you’ll need:
- Dish soap (the regular kind, like Dawn or Palmolive, not dishwasher soap)
- Isopropyl alcohol (shoot for 99% for the best cleaning power)
- Toothbrush (an old one works, but don’t use the one you brush your teeth with!)
- Q-tips and toothpicks
- A bowl, cup, or any container to hold liquid
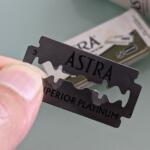
Safety First: Blade Removal and Precautions
Safety always comes first, so let’s go over some important precautions:
- Carefully remove the blade from your safety razor before cleaning.
- Dispose of used blades in a designated blade bank or container.
- Avoid using abrasive cleaners or tools that could scratch the razor’s finish.
- If your razor has multiple pieces, disassemble it for thorough cleaning.
Cleaning Steps: A Quick Overview
Here’s a summary of the cleaning steps we’ll be going through in this guide:
| Step | Description |
|---|---|
| 1 | Prepare a sudsy soak with warm water and dish soap |
| 2 | Scrub the razor with a toothbrush to remove buildup |
| 3 | Detail clean with Q-tips and toothpicks |
| 4 | Rinse the bowl and toothbrush |
| 5 | Disinfect and polish with isopropyl alcohol |
Step 1: Sudsy Soak
Fill the bowl about 2/3rds of the way full with warm water and add a few squirts of dish soap. Use the toothbrush to mix the soap into the water until you’ve got a nice, sudsy mixture. This soapy solution is perfect for tackling soap scum and grime on your razor’s metal.
Step 2: Scrub-a-Dub-Dub
Grab your toothbrush and dip it into the soapy water. Now, gently scrub away at the buildup on your safety razor. The bristles are ideal for dislodging grime without scratching the metal. For any stubborn spots, give it a second scrub. Don’t forget to clean the handle and all parts of the razor.
Step 3: Detail Cleaning
Time for some detail work! Swirl a Q-tip in the soapy mixture and use it to clean all the little crevices in your razor. Use toothpicks to carefully pick away at any buildup in tight corners. The soft wood won’t damage the razor’s finish. If your razor has multiple pieces, be sure to clean each one thoroughly.
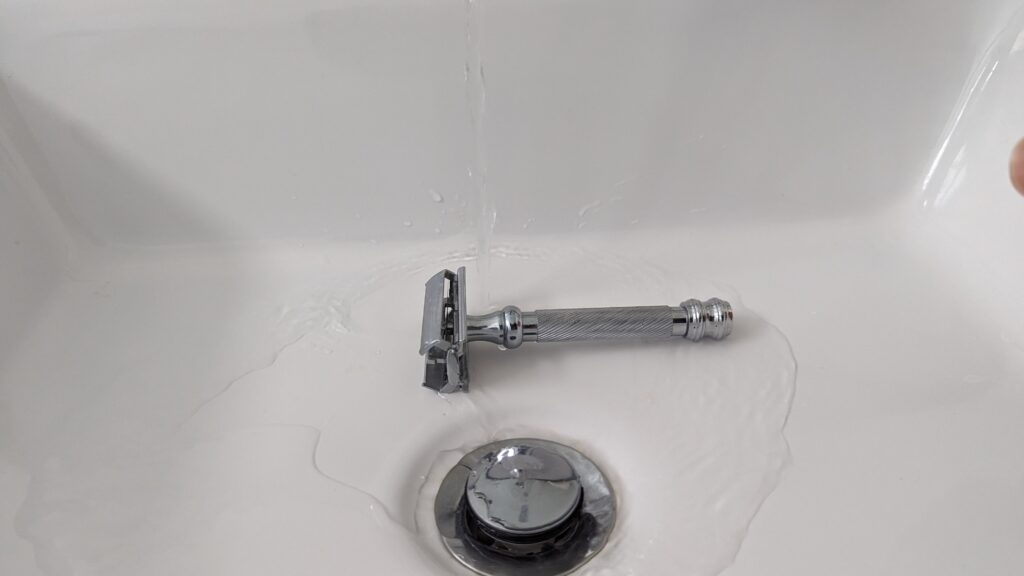
Step 4: Rinse and Repeat
Once you’re done with the detailing, rinse out the bowl and clean your toothbrush. We don’t want any soap scum going back onto your razor. Now, fill the bowl halfway with isopropyl alcohol, which will disinfect the razor and remove any remaining residue.
Step 5: The Final Polish
Dip the toothbrush in the alcohol and give your razor a gentle scrub. The alcohol not only sanitizes the razor but also leaves a brilliant shine once it evaporates. Bonus tip: If you live in an area with hard water, you can repeat this step with white wine vinegar to remove any lime or calcium deposits.
Conclusion
And there you have it—a clean and shiny safety razor that’s ready to provide you with close, comfortable shaves. Allow the toothbrush and bowl to dry, and store your cleaning supplies for future use. Remember, a well-cared-for safety razor is an investment in great shaves for years to come.
So, treat your trusty razor with the TLC it deserves and enjoy the rewards of a perfectly maintained shaving companion. Happy shaving!
Last update on 2024-04-19 / Affiliate links / Images from Amazon Product Advertising API
Affiliate Disclosure: This post contains affiliate links, which means I may receive a small commission, at no extra cost to you, if you make a purchase using these links.

Jay Kang
Just because i'm asian does not mean I don't need shaving. I always wanted to grow a beard when I was young, now I need to shave because hair growth for me is a problem. I'm going through what every man will and has gone through before.